Let your imagination run wild and use your manual skills to make your own coat rack from these simple ideas. You can use some reusable materials that you have at home.
 Coat racks are seen less every day in modern homes. However, it can be a very useful and decorative piece in any home. On a coat rack you can hang your coats, purse, umbrellas and hats.
With a little imagination you can make your own coat rack that looks very contemporary or rustic, depending on how it suits your home’s design, and without spending a lot of money. Only use what you have on hand, recycle used objects and you will have a coat rack made to your liking.
How to make a rack with bottles?
If you are looking for an idea to reuse the bottles that you have accumulated at home, then opt for this interesting project. You can make a rack to hang your hats or any accessory you prefer.
What do you need?
- 4 or 5 glass bottles. They can be more or less and can be the same or different, depending on the design you choose.
- A rectangular sheet of glass or acrylic.
- A piece of fine twine.
- A lighter.
- A container with water.
- Transparent glue.
Instructions
- First, tie the string around a bottle, about 2 inches below the neck. Make sure the string has only one turn and fits snugly.
- Next, wet the rope with alcohol, which is well impregnated.
- With the lighter he sets the string on fire. You may need to test several times if it turns off too fast.
- After about a minute of continuous fire and before it goes out, put the bottle in the container with water. You should hear a few clicks of the glass breaking. This means that the bottle has the cut along the string.
- Repeat the process with the other bottles. Measure to keep the same size in all.
- On the glass or acrylic sheet, mark the spaces where you want to glue the bottles.
- Apply clear glue, preferably with a glue gun.
- Glue the bottles to the marked spot on the glass or acrylic sheet.
- Lastly, when it dries, you can hang your new coat rack on the wall using top and bottom fastening nails. You can also cut two small holes in the top corners to insert a normal nail.
Coat rack with forks
Do you have old forks that you no longer use? Then turn them into a rack to hang your hats. You will only have to fold them to give them the desired shape.
What do you need?
- Antique forks.
- Drill with a small metal drill bit.
- A piece of wood.
Instructions
- To start, put the fork on the wood and secure it well with tape or rubber bands.
- Next, with the drill, drill a small hole in the top of the fork handle.
- Take out the fork and with the pliers bend the handle up, approximately from the center.
- You can also bend some of the tines of the fork to make a design to your liking.
- Finally, stick the fork into the wall using the hole you made at the beginning. You can also nail the forks to a piece of wood and nail the wood to the wall.
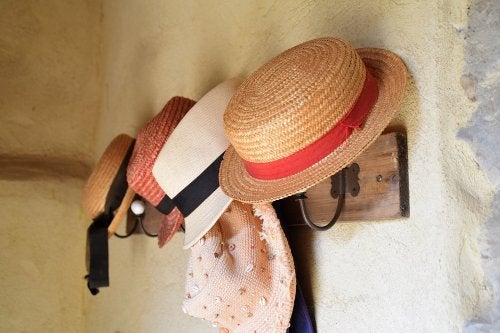
Rustic coat rack
Rustic-style coat racks are ideal for those who like this style. Even they go well in those spaces with decoration vintage.
What do you need?
- Coat hooks(available at hardware stores).
- Nails and hammer.
- Hanging hooks
Instructions
- First, cut several rectangular pieces of wood, roughly the size.
- Then paint them to your liking.
- Put them next to each other and put a strip of wood on top and another on the bottom.
- Next, nail the strip of wood to each of the pieces of wood with small, fine nails.
- Between the two strips of wood, nail the coat hooks into each piece of colored wood.
- To finish, you can nail the coat rack directly to the wall by cutting holes in the top corners or you can nail hanging hooks to the back.
Have you already tried to make these racks to hang your hats? As you just noticed, they are easy to make and you can use materials that you have at home.